Did you know you can customize the procedure buttons and button sets in the Patient Chart? You can create new buttons, edit, customize, and delete existing buttons. Plus, you can create different sets of buttons to match the procedures you perform in your office most often, or even for procedures specific to an operatory.
To customize a procedure button set:
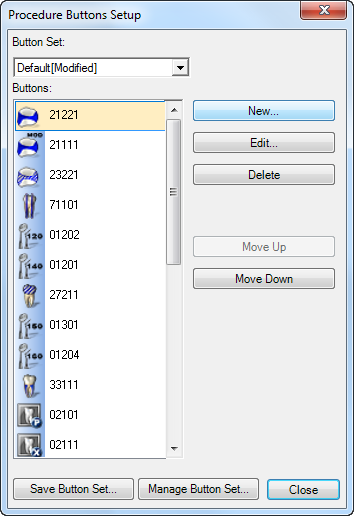
- From the Patient Chart, click Setup > Procedure Button Setup.

- From the Button Set drop-down list, select the existing button set you’d like to customize.
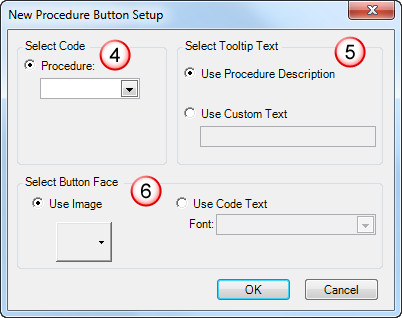
- Click New to create a new procedure button for this set.
- In the Select Code group box, use the drop-down list to select the individual procedure you want to add.
- In the Select Tooltip Text group box, do one of the following:
- Use Procedure Description – select this option to assign the ADA procedure description.
- Use Custom Text – select this option to create your own procedure description.
- In the Select Button Face group box, do one of the following:
- Use Image – select this option to assign an image to the button being created. Use the drop-down options to either create a New Image or use the Choose Image option to select an image file already created in Dentrix.
- Use Code Text – select this option to assign text to the procedure code instead of a button image, and then select a font from the drop-down list.
- Click OK.
- Click Save Button Set to save the procedure buttons you have customized.
- In the New Button Set Name field, give the set you have created a name and click OK.
- Click Close.
For more information and specific steps to edit, delete, or move a procedure button up or down with the set, see the Setting up Procedure Buttons Overview topic in Dentrix Help.


