Completed procedures are moved into history when you close the month in Dentrix. This protects them from being changed, because when you move a completed procedure into history, you cannot edit or delete it.
This does not mean, however, that you cannot correct an error in history. To provide a correction, you must invalidate and then replace the incorrect procedure with a corrected version. When you invalidate a procedure, the paint colors in the Patient Chart associated with the invalidated procedure are removed and the related progress notes entry for the procedure are also removed so the patient’s record is accurate.
Please note: This tip focuses on how to invalidate a procedure in the Patient Chart, and re-post a corrected, backdated procedure so the clinical record is accurate. Click HERE for a tip on how to invalidate a procedure from the Ledger, which will include steps on how to post payment adjustments (as needed) as well as re-posting a corrected, backdated procedure, so your financial records are accurate.
To invalidate a procedure from the Chart:
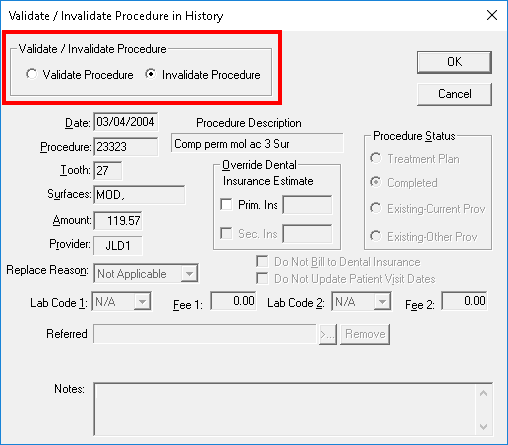
- In the Patient Chart, select a patient and double-click the completed procedure to be invalidated to open the Validate/Invalidate Procedure in History dialog box.
- Make note of the specific information about the procedure (such as date, tooth, surfaces, provider, etc.) if you will be re-posting a corrected procedure.
- Under Validate/Invalidate Procedure, select Invalidate Procedure.
- Click OK to return to the Patient Chart.
- If needed, re-post the corrected, backdated procedure in the Patient Chart, making sure to edit the procedure date to reflect the date the procedure was originally completed so your clinical records are accurate.
For more information, read the Invalidating Procedures in History topic, in Dentrix Help.


