Occasionally you may find procedures that were posted incorrectly, such as a composite that was posted to the wrong tooth number or a crown that was posted as the wrong type of crown. You cannot edit or delete procedures in history, but you can correct the information. To correct a procedure in history, you must invalidate the incorrect procedure and then post a corrected, backdated procedure.
To invalidate a procedure in history:
- Select a patient in the Ledger.
- Find the procedure that needs to be corrected. Note the details of the procedure (date, procedure code, tooth number, surfaces, provider, etc.) as you will need this information when you post a corrected procedure.
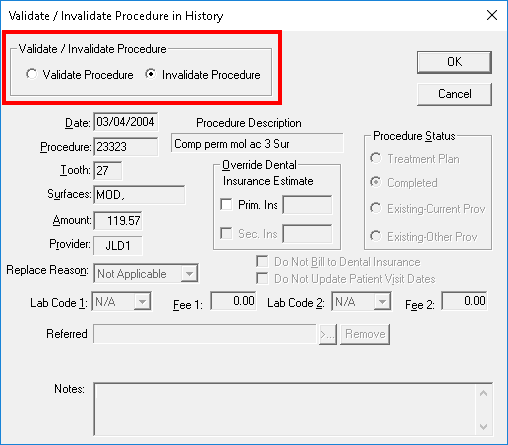
- Double-click the procedure to open the Validate/Invalidate Procedure in History dialog box.

- Under Validate/Invalidate Procedure, select Invalidate Procedure.
- Click OK to return to the Ledger.
The procedure will have a + next to it in the Description column of the Ledger to indicate that it was invalidated. - To continue with the correction, click the Enter Procedure button.
- Enter the corrected procedure information. Be sure to backdate the procedure to the date the original procedure was posted.
- Click OK to post the corrected procedure.
The procedure will have a ^ next to it in the Description column of the Ledger to indicate it was backdated.
When you invalidate a procedure in the Ledger, the procedure is marked with a + symbol, but nothing happens to any associated financial information for the procedure, such as payments. When you re-post a corrected procedure, if there is a difference in the amount charged for the invalidated procedure, and the corrected procedure, you must enter an adjustment to make your financial records accurate.
To post an adjustment:
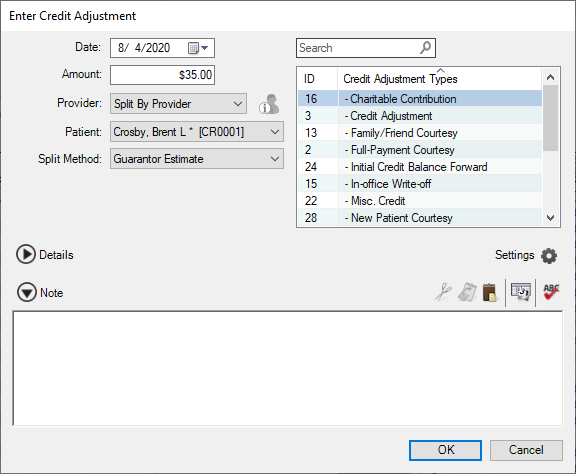
- In the Ledger,from the Transaction menu, click Enter Adjustment.
- Select Credit Adjustment.
- In the Amount field, enter the amount of the adjustment.
- Select the Credit Adjustment Type to apply from the list.
- Select the Provider to whom the adjustment should be applied. By default, the patient’s primary provider is selected.
- From the Patient drop-down list, select the family member to whom to apply the adjustment.
- In the Note field, enter any notes about this adjustment as needed.
- Click OK to post the adjustment.
For additional information, read the Invalidating a Procedure in History topic in Dentrix Help.


