
Sometimes it can seem like you’re trying to schedule Goldilocks for an appointment. “That appointment is too late. I need an appointment in the morning,” the patient says. “I can’t come in on Tuesdays or Thursdays this month,” she declares. With Goldilocks as your patient, you won’t get her scheduled unless the appointment is “just right.”
The Find New Appointment Time feature in Dentrix works like magic for these hard-to-please patients. Simply enter the patient’s requirements in the dialog box and Dentrix will do all the hard work of finding that “just right” appointment time.
To use the Find New Appointment Time feature:
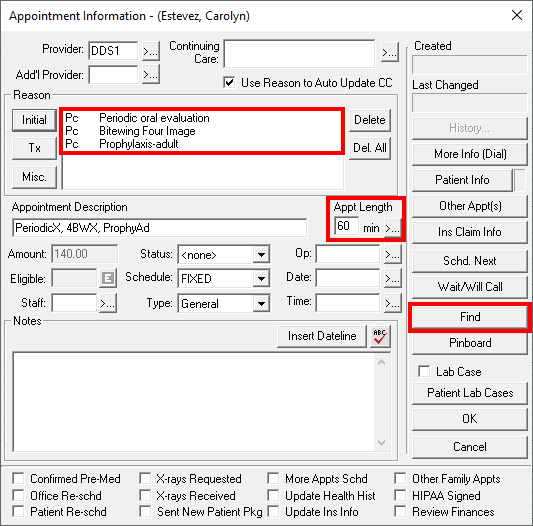
- From the Appointment Book, click the Schedule Appointment button. Select a patient and click OK.
- Enter the Reason for the appointment and/or the Length of the appointment in the Appointment Information dialog box.

- Click Find to open the Find New Appointment Time dialog box, with the appointment length already filled in for you.
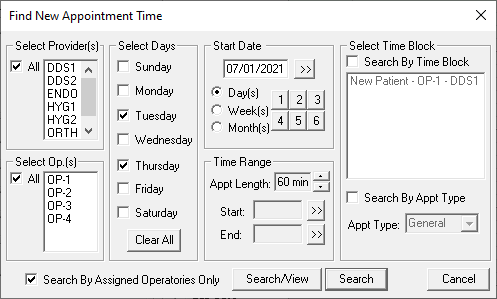
- Enter filters to narrow down your search. You won’t need to use all the search filters every time. The key to using the Find New Appointment Time feature effectively is only entering the filters you need to find the first available appointment that will work for your patient.
- Select Providers: At a minimum, select the providers this patient can see. (If you check the Search by Assigned Operatories Only check box, the search will only look at the operatories assigned to the selected provider.)
- Select Days: If there are specific days that your patient is available, use this option. For example, if your patient can only come in on Mondays, Wednesdays or Fridays, click Clear All and check only Monday, Wednesday and Friday.
- Start Date: By default, the search will start from today’s date. However, if the doctor has told you that this patient needs to come back in three weeks, you can easily change the start date with two clicks. Click the Weeks option and then click 3. The Start Date will advance out three weeks.
- Time Range: You’ve already set the length for the appointment, but you can also specify when to start looking. If the patient needs an appointment after 3:00 pm, then enter 3:00 as the Start time. Similarly, if the patient prefers a morning appointment, then enter a Start time of 8:00 am (or whenever your office opens) and an end time of noon.
- Select Time Block: If your office is using Perfect Day Scheduling, you can use the Select Time Block option to find an available opening for the type of production you’re trying to schedule. Check Search by Time Block and select a specific time block to search for appointment times within that specific time block, or check Search by Appt Type and select a specific appointment type to search in time blocks that are designated for that appointment type.
- Click Search/View to see the first two available times in the Appointment Book that match your search criteria.
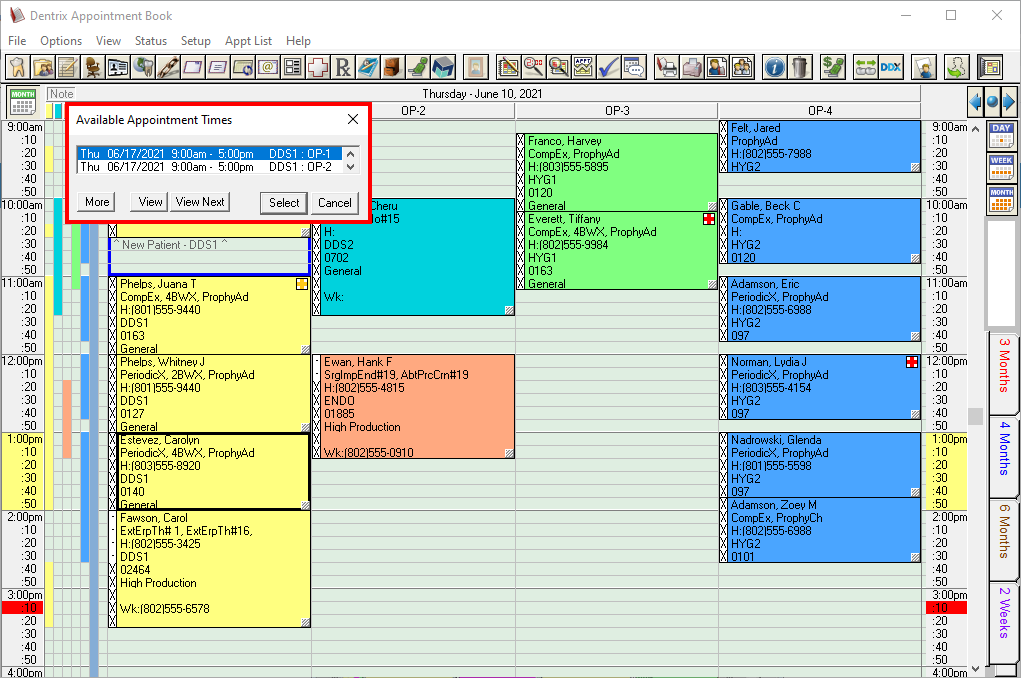
- With an available time highlighted, click View to see the time in your Appointment Book. Click View Next to see the next available spot in the book. Repeat until you find a time that works.
- Click Select to select the highlighted appointment date and time. You’ll be returned to the Appointment Information dialog box where you can continue to edit or save the appointment.
Keep in mind that you can use this feature for more than just those hard-to-schedule patients. While many users might believe it’s easier to manually search for an available time, using the Find New Appointment Time feature can help you find the nooks and crannies in your schedule that, once filled, can lead to increased profitability and production.
To learn more about the Find New Appointment Time feature, see the Finding New Appointment Times topic in Dentrix Help.


