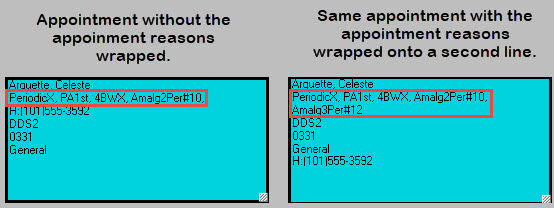
When patients are seen for an appointment, they often are being seen for more than one reason. When those appointment reasons take up more than one line of text on the appointment, you have to open the Appointment Information dialog box in order to see all the procedures attached. It’s easy to change the view to display two (or more) lines of appointment reasons so that the text wraps to the next line on those appointments that have several procedures attached.
Depending on the length of an appointment, up to nine lines of information can appear on the face of an appointment. You can customize and prioritize the text lines for each appointment.
How to Wrap Appointment Reasons on an Appointment
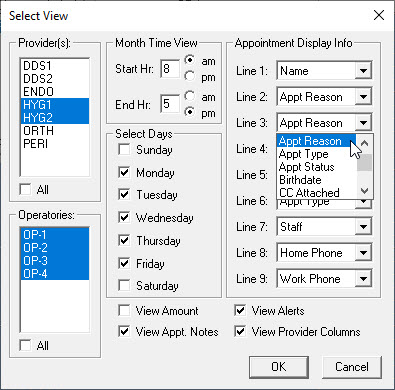
- From the Appointment Book, click View.
- Select the view you want to display the appointment reasons for, and click Edit.

- In this example, Line 2 is set to show the appointment reason. From the Line 3 list, select Appt. Reason to wrap the appointment reason to the next line. If you frequently schedule several different procedures for an appointment, you can use the appointment reason on two or even three adjacent lines as needed. That way, if the description will not fit on one line, it will wrap to the next line.
- Click OK to save your changes.
Based on the view you set up, this example shows the patient’s name on the first line and the appointment reasons appear on the next two lines of the appointment.
Keep in mind that you can create different Appointment Book views for different people in the practice. For example, a scheduling coordinator may want to see different appointment information than an insurance coordinator, and you can customize each view to display information accordingly.
Additional Information
- To learn more about Appointment Book Views, read the Setting Up Views topic in Dentrix Help.


