One of the overlooked features in the Dentrix Patient Chart is the ability to make chart notations. The Chart Notations feature allows you to “draw” on a patient’s chart! For practices with computers visible to patients in the operatory, you can use chart notations to explain problem areas by drawing on or highlighting certain teeth or surfaces, which can help patients visualize what the dentist or hygienist is telling them.
To make notations:
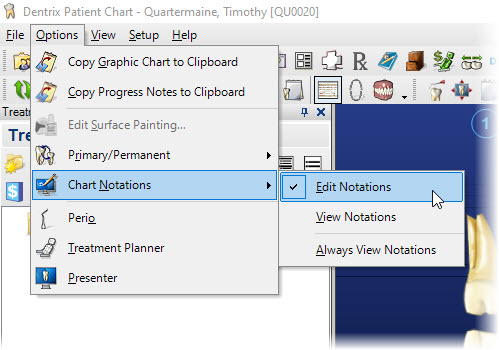
- With a patient selected in the Chart, from the Options menu select Chart Notations and then Edit Notations. A small Dentrix Notations toolbar will appear on the screen.

- From the Dentrix Notations toolbar, select a notation tool to use from the following options:
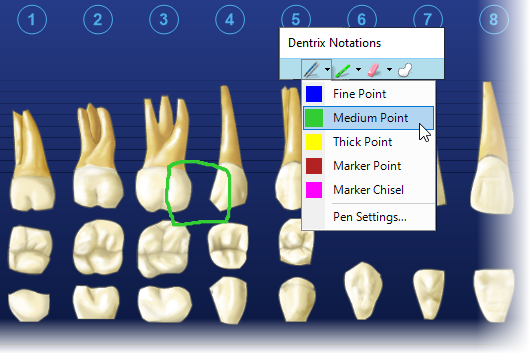
- Pen – The pen tool enables you to draw or write on the Chart using a variety of widths and colors. Click the down arrow next to the pen icon to select the desired color and width. Select Pen Settings to customize the colors and widths listed as needed. You can use this tool if you want to pinpoint specific teeth a patient should focus on, or to illustrate an area of a particular tooth or root.
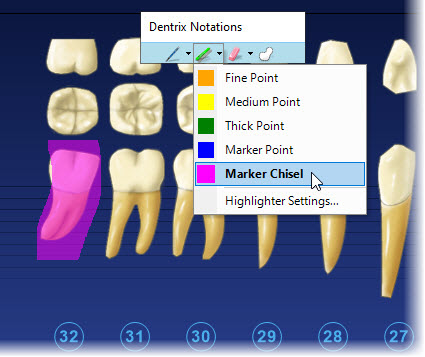
- Highlighter – The highlighter tool is transparent, allowing you to view the tooth chart through the notation. Click the down arrow next to the highlighter icon to select the desired color and width. Select Highlighter Settings to customize the colors and widths listed.
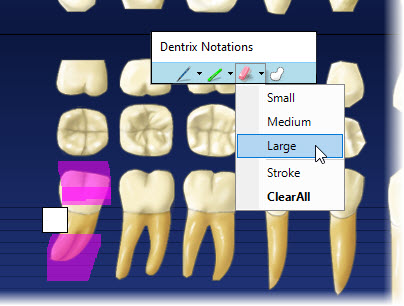
- Eraser – The eraser tool enables you to remove all notations or only selected ones. Click the down arrow next to the eraser icon to select the size of eraser you want to use. Then click and drag the white eraser cursor over the notation(s) you want to remove, or you can click Clear All to erase all notations.
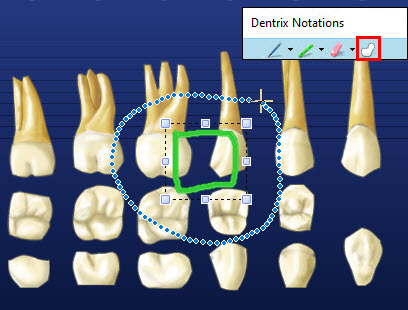
- Selection Tool – The selection tool enables you to move, enlarge, or minimize specific notations. First, make a notation using either the Pen or Highlighter tool. Then click the Selection tool and drag it around the desired notation, surrounding it with a dotted line.
You can then click and drag the entire notation to a different area, enlarge the notation by dragging the corners out, or minimize the notation by dragging the corners in. You can delete by right-clicking on the selection and choosing Delete Selection.
- Pen – The pen tool enables you to draw or write on the Chart using a variety of widths and colors. Click the down arrow next to the pen icon to select the desired color and width. Select Pen Settings to customize the colors and widths listed as needed. You can use this tool if you want to pinpoint specific teeth a patient should focus on, or to illustrate an area of a particular tooth or root.
When you are finished making notations, you can either use the Eraser tool’s Clear All option to remove all the notations at once; or, if you want to keep the notions and simply return to the normal view in the Chart, you can select Options > Chart Notations and then toggle the View Notations on or off, depending on when you want to view them again.
What types of things do you (or will you) use Chart Notations for? Let us know in the comments.
For additional information, see the topics listed under Chart Notations Overview in Dentrix Help.


