A multi-code allows you to group together procedures you commonly use in order to save time when charting, scheduling, and posting. By creating multi-codes you don’t have to post or schedule each of the procedures separately.
You can create customized multi-codes to meet the specific needs of your practice. You can add up to eight procedures in each multi-code, and each multi-code can contain one other multi-code.
To create a multi-code:
- n the Office Manager, select Maintenance > Practice Setup > Multi-code Setup.
- Click New.

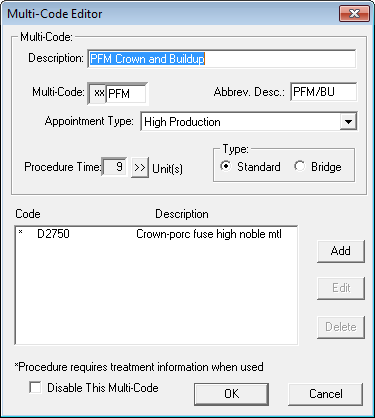
- In the Description field, enter a description of the multi-code you are creating. The description can have up to 31 characters.
- In the Multi-Code field, enter three characters to use for the multi-code. Note: Dentrix automatically adds “xx” to the beginning of all multi-codes.
- In the Abbrev. Desc. field, enter a short description of the multi-code (up to 9 characters). This description shows on the face of the appointment in the Appointment Book.
- In the Appointment Type drop-down list, select the appropriate appointment type. Appointment types classify an appointment according to the amount of production the appointment will generate.
- In the Type group box, select whether this is a Standard multi-code or a Bridge.
- Click Add.
- Use the search button to select the codes you want the multi-code to include and click OK. You can select from CDA Codes.
- Repeat step 9 for any other procedures you want included in the multi-code. Note: You can add up to eight procedures to each multi-code, and one multi-code can be included in that list. For example, if you have more than eight procedures you want to add, create a multi-code for some of the procedures, then add that multi-code to the multi-code you are creating.
- Based on the procedure codes included in the multi-code you created, Dentrix automatically calculates the time needed for the appointment and enters it in the Procedure Time field. You can manually adjust this time as needed. Click the search button to open the Appointment Time Pattern dialog box and select the number of time units that should be used in the Appointment Book for this multi-code.
- Click OK to close and save the multi-code.
For additional information, see the various topics linked to in the Multi-Code Setup topic in Dentrix Help.


