Unless you stay on top of things, the Unfiled Documents window within the Dentrix Document Center can quickly become unmanageable. You should make it a priority to go through your Unfiled Documents and attach them to their relevant sources or delete them so they aren’t taking up space.
Sorting items in the Unfiled Document can be a place to start, and then work through the items to attach them to sources. To attach or delete Unfiled Documents:
- Sort items within Unfiled Documents. With Dentrix G6 and later, you can sort Unfiled Documents either by the date they were scanned or by the time they were scanned (or printed) to the Document Center. This makes it easier to find documents if you have an idea when you scanned them or on which day you scanned them. Within Unfiled Documents, click either the Date or Time tab depending on how you want the items sorted.
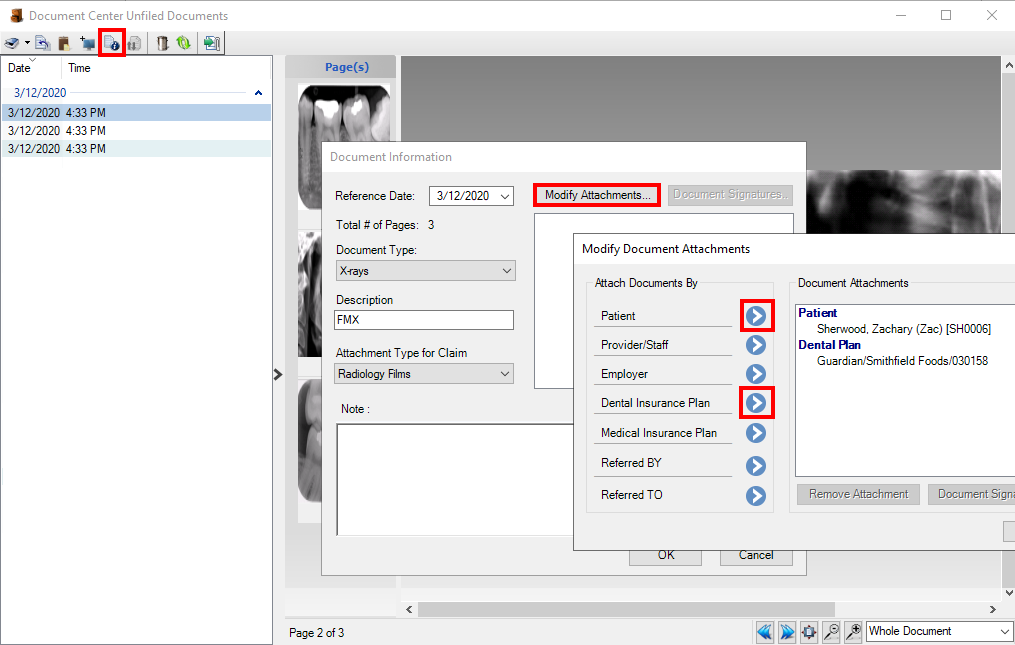
- Attach files to sources. Select a document from Unfiled Documents window. You can see a preview of the document to determine which source(s) to attach it to. Then click the Document Information button. Select a Document Type and enter a Description for the item. Then click the Modify Attachments button. Under Attach Documents By, click the search arrow next to a source, select the source, and click OK. Repeat to attach the document to multiple sources, if applicable. Then click Close, and OK. The selected item is removed from Unfiled Documents and will be attached to the source(s) you selected.
- Delete items from Unfiled Documents. At times there may be documents that you are unsure of where to attach them. Maybe they are unlabeled X-rays or images, or duplicate documents to ones you have already attached to sources. To delete an item from Unfiled Documents, select the item in the list, and then click the Delete icon. Confirm that you want to delete the item, and click OK.